

Bugatti Chiron (42083): the gearbox that changed Technic
The Chiron was the second of LEGO’s 1:8 scale Technic supercars, two years after the Porsche 911 GT3 RS (42056), and it is the one where the gearbox finally caught up with the bodywork. Eight forward speeds and reverse, selected from paddles under the steering wheel, with a W16 turning sixteen pistons behind the seats. Finished, it is 56 cm long and heavier than it looks.
It is in the Brick Club library and it goes out a lot. Below is what it actually does, how the six boxes split the build, and the places where members have had to backtrack.

Why this one still matters
Three parts arrived in this box that Technic gearboxes have leaned on ever since. The orange rotary changeover catch lets a gear be engaged by turning an axle a quarter turn instead of sliding a lever sideways. A blue 20-tooth gear with a pin hole instead of an axle hole, and clutch faces on both sides, was made to work with the selector rings. And a yellow driving ring extension with eight internal teeth took some of the slack out of the shift. Huw at Brickset called the orange catch the part that would change how gearboxes get designed,
The other thing the Chiron fixed was a complaint about the Porsche. On the 911 you could not see the gearbox at all once the body was on. Here there is a gap in the floor under the car, and if you turn it over and pull a paddle you can watch the lower selector rings slide across. It is a small window, but it is the honest kind of detail that makes the build feel like it was worth doing.
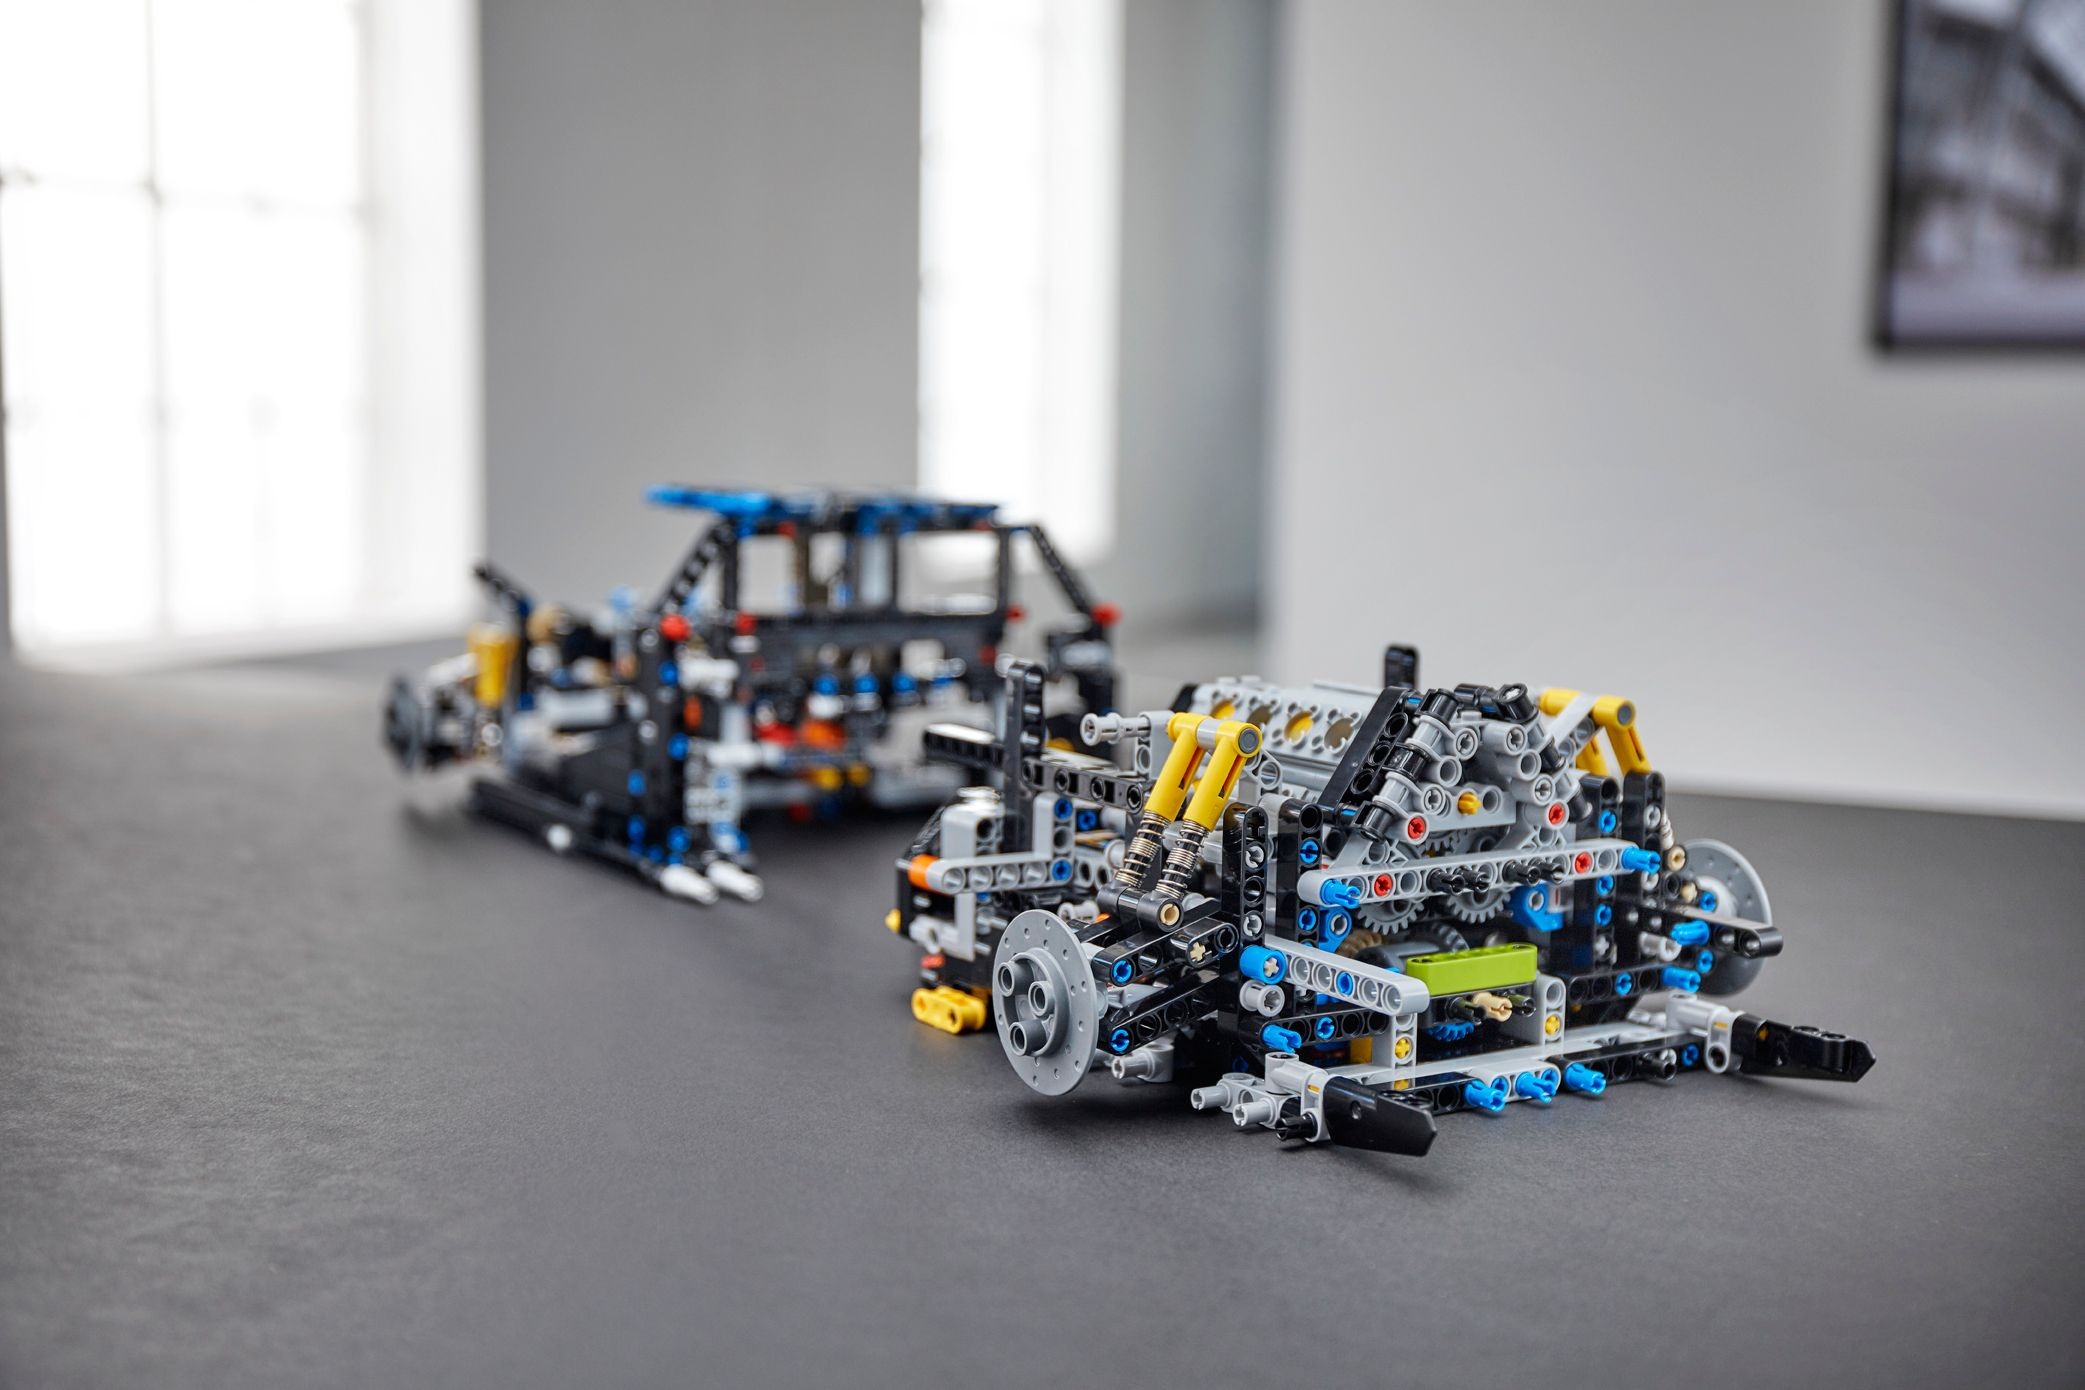
The instructions come in two books, 306 and 318 pages, 970 steps in total. Book one is the chassis, both halves. Book two is the body. LEGO calls the moment the two chassis halves meet the marriage, and it is genuinely the high point of the build.
What it actually does
Everything below is worked by hand. There are no motors in the Chiron, which is part of its appeal: every function is a mechanical path you built yourself.
The paddles sit under the steering wheel rather than on it, which is how the Porsche did it and why the Porsche’s paddles were awkward. Each push ratchets an axle a quarter turn, left paddle one way and right paddle the other. That axle runs back through the chassis to the gearbox, where the orange rotary catches move the selector rings between top, neutral and bottom positions, two rings per catch. A separate forward and reverse selector sits in the middle of the car, next to the model’s only clutch gear, which is there to protect the drivetrain rather than to copy anything on the real car.
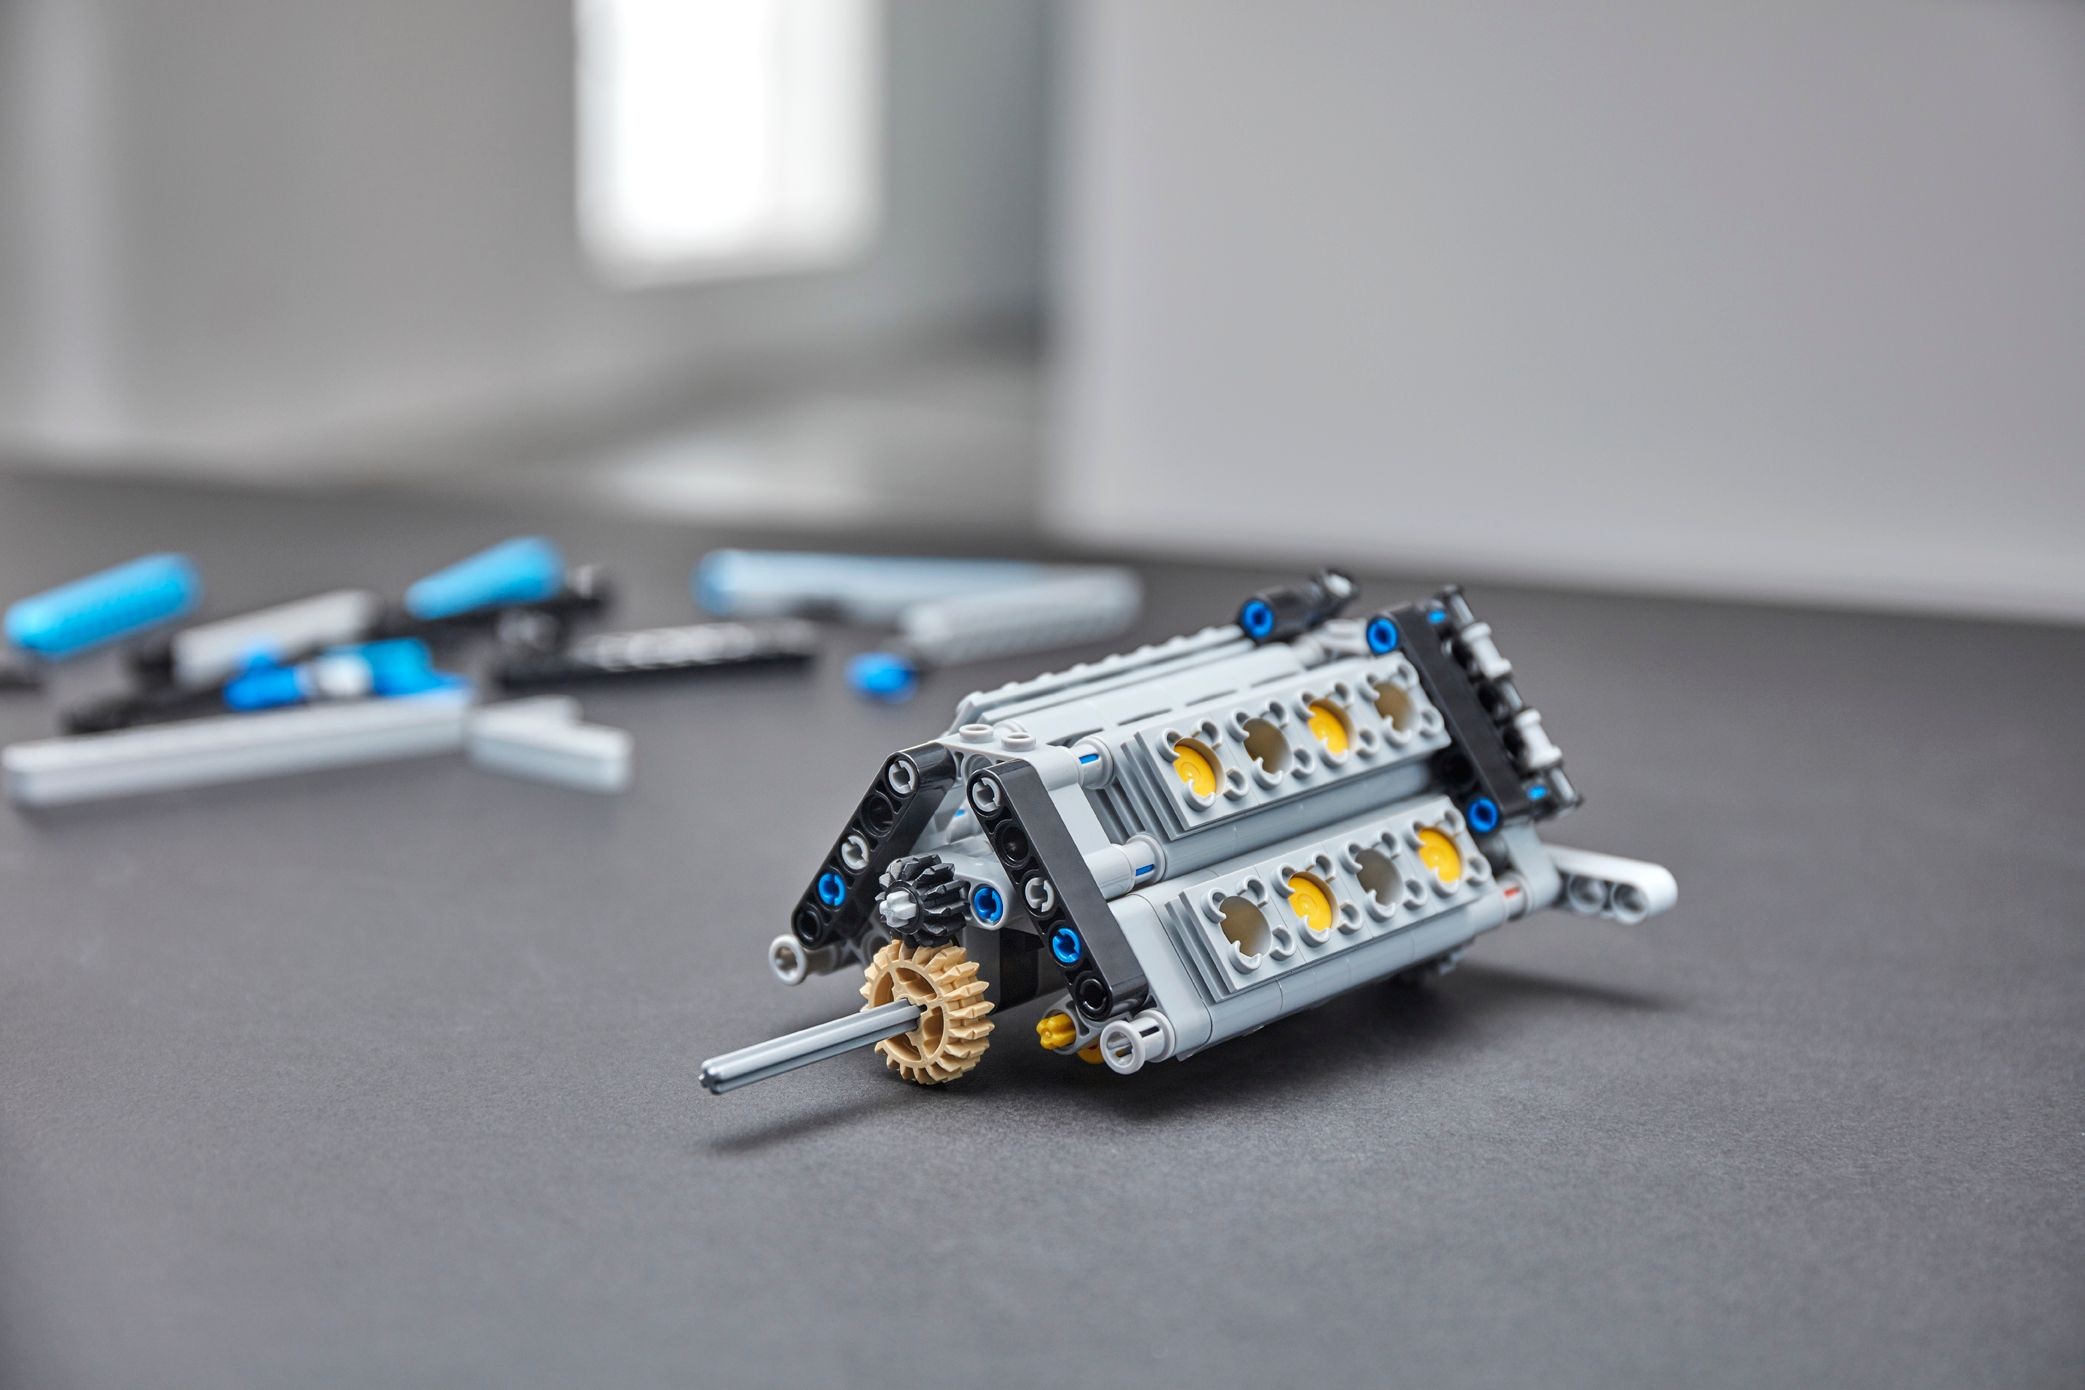
Roll the car and the rear wheels drive the differential, the gearbox and then the engine. There is no single crankshaft. Three axles carrying three 24-tooth gears turn the four banks of four cylinders, which is why it runs smoothly and why it is the most complex engine LEGO had put in a Technic set at the time. It sits directly on top of the gearbox, so once it is in place you will not see the gears again.
The grey key you build at the very end is a copy of the Top Speed key that comes with the real car. Slot it into the port behind the rear wheel and turn: the first part of the turn raises the wing, the rest tilts it into the airbrake position. It is a neat piece of theatre, and it is the one function that visitors ask to try.
Steering comes from the steering wheel in the cabin, with the paddles mounted just below it, which leaves very little legroom for an imaginary driver. There is no hand-of-god knob on the roof, so if you want to swing the front wheels you reach in through the door.
Both ends use two shock absorbers a side, with the then-new disc brake hub behind every wheel. The suspension is stiff even before the springs go on. It needs to be: Huw at Brickset found the body heavy enough that the chassis does not spring all the way back after you press down over a wheel.
The bonnet lifts to show a small front boot, a set of Bugatti-branded luggage and a printed tile with a unique code that unlocked online extras when the set was current. The doors open on proper hinges and the insides are stickered. The rear light bar is a red flex tube held at each end by, of all things, a pair of stud shooters.
How the build goes
Six numbered boxes inside the outer box, one per stage, and the stage boxes have artwork on them that lines up into a picture of the car. Huw at Brickset built it over two days and put it at 10 to 12 hours; other builders have reported 14 to 20.
Rear axle, gearbox and engine
The rear suspension and disc brake hubs come first, then the gearbox is built as its own unit and bolted to it, then the W16 goes on top. This is the hardest hour of the set. Before you move on, turn the drive axle by hand and click through every gear. Once the engine is on, a mistake in here means taking most of it apart.
Front chassis and the marriage
Front suspension, the steering column and the paddle ratchet. The ratchet feels flimsy on the bench because the chassis has not closed around it yet; that is normal. Then the two halves are joined. If every pin and axle lines up first time, the paddles will already shift the gearbox and the pistons will move when you roll it.
Rear bodywork and the wing
Dark blue panels, the wing linkage and the red flex-tube light bar. This is where the car starts to look like a Chiron and where the build gets quicker.
Interior and dashboard
Dark tan seats, stickered dials and the steering wheel with the paddles under it. Four Technic parts were moulded in dark tan for the first time for this interior.
Doors, nose and grille
Dark azure panels for the doors and the front, many of them new in that colour, and the horseshoe grille.
Windscreen, C-line, wheels, key
Windscreen surrounds, the long flex tubes that form the C shape behind each door, then the dark blue rims and tyres. The rims are unusual: they carry pins rather than holes, so they push onto the disc brake hubs. Last of all you build the speed key and the luggage.
Three of our members have built this one and written it up. Between their notes and the reviews, these are the points to slow down for.
- Test the gearbox at the end of box 1. Huw at Brickset says so in as many words, and Jim at Eurobricks checked the shift sequence the moment the marriage was done. The engine sits on top of it, and after the marriage it is effectively sealed in.
- Selector rings and orange catches. Each catch moves two rings. If one ring is a stud out, one pair of gears will grind and the shift pattern will feel wrong. The Brick Fan review describes building too fast, missing a single part here and having to backtrack a little.
- The C-line flex tubes. The long tubes behind the doors need to follow the panel edge. Seat both ends first, then persuade the middle.
- Rims with pins. These wheels push onto the hub rather than accepting a pin, so the brake disc has to face the right way before the wheel goes on.
- Stickers on the dashboard and doors. All three dials are stickers. Dry-fit the panel, then apply them with the panel flat.
On the shelf
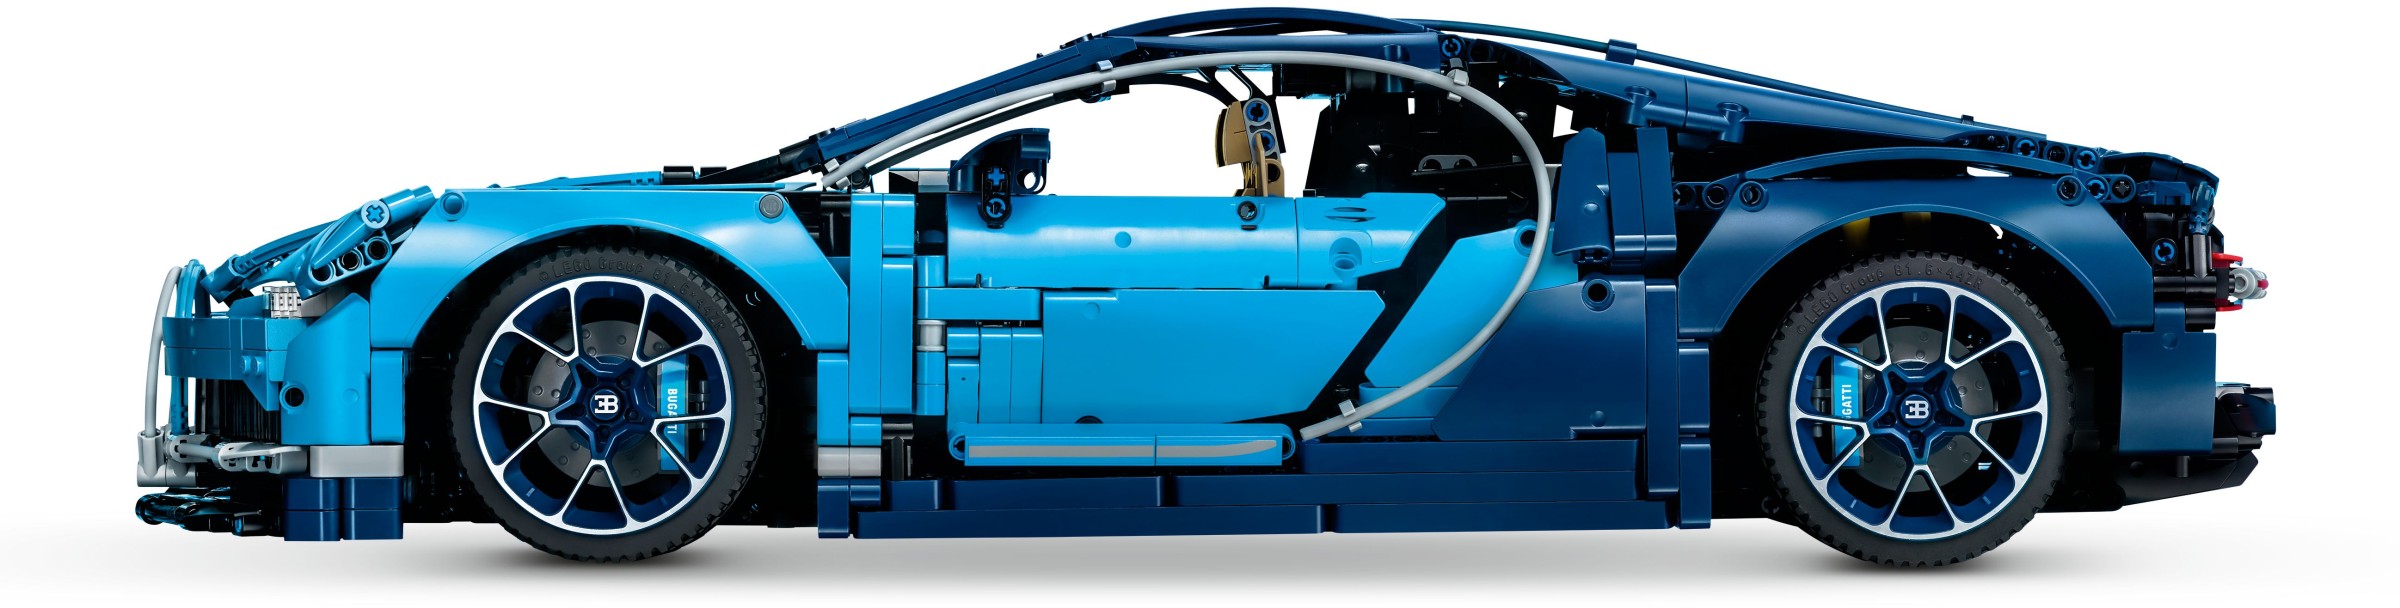
The two-tone blue is dark azure over dark blue, which is the two-tone Bugatti has made its trademark, and it photographs better in daylight than under warm lamps. The model is 56 cm long and 25 cm wide, so it needs a full shelf to itself, and the front splitter is low enough to catch on a rug if you push it along the floor.
Turned upside down, the gap in the floor shows the lower selector rings, which is the best place to demonstrate the gearbox to someone who has not built it. The wing can be left raised for display.
Members who have built it
Three Chiron builds have come back through the door with photos and notes. The diaries are linked under each picture.


If you have not built one of the 1:8 cars, this is a good first one to get. The Chiron asks more of you in the first two boxes than the Sián or the Daytona do, and it pays you back with a gearbox you can feel working. Allow three evenings, keep the box lids in order, and test the gears before the engine goes on.
If you like this one, try
The other 1:8 supercars in the library. The Porsche is the Chiron’s predecessor; the McLaren P1 is the most recent and has the same idea of a gearbox with a different answer.


The Bugatti Chiron is in the library
Technic Fan gets up to 6 kits a year, Master Builder up to 12. Delivery both ways is included and the prepaid return label is in the box.