

Land Rover Defender (42110): two gearboxes and nine gears in an off-roader
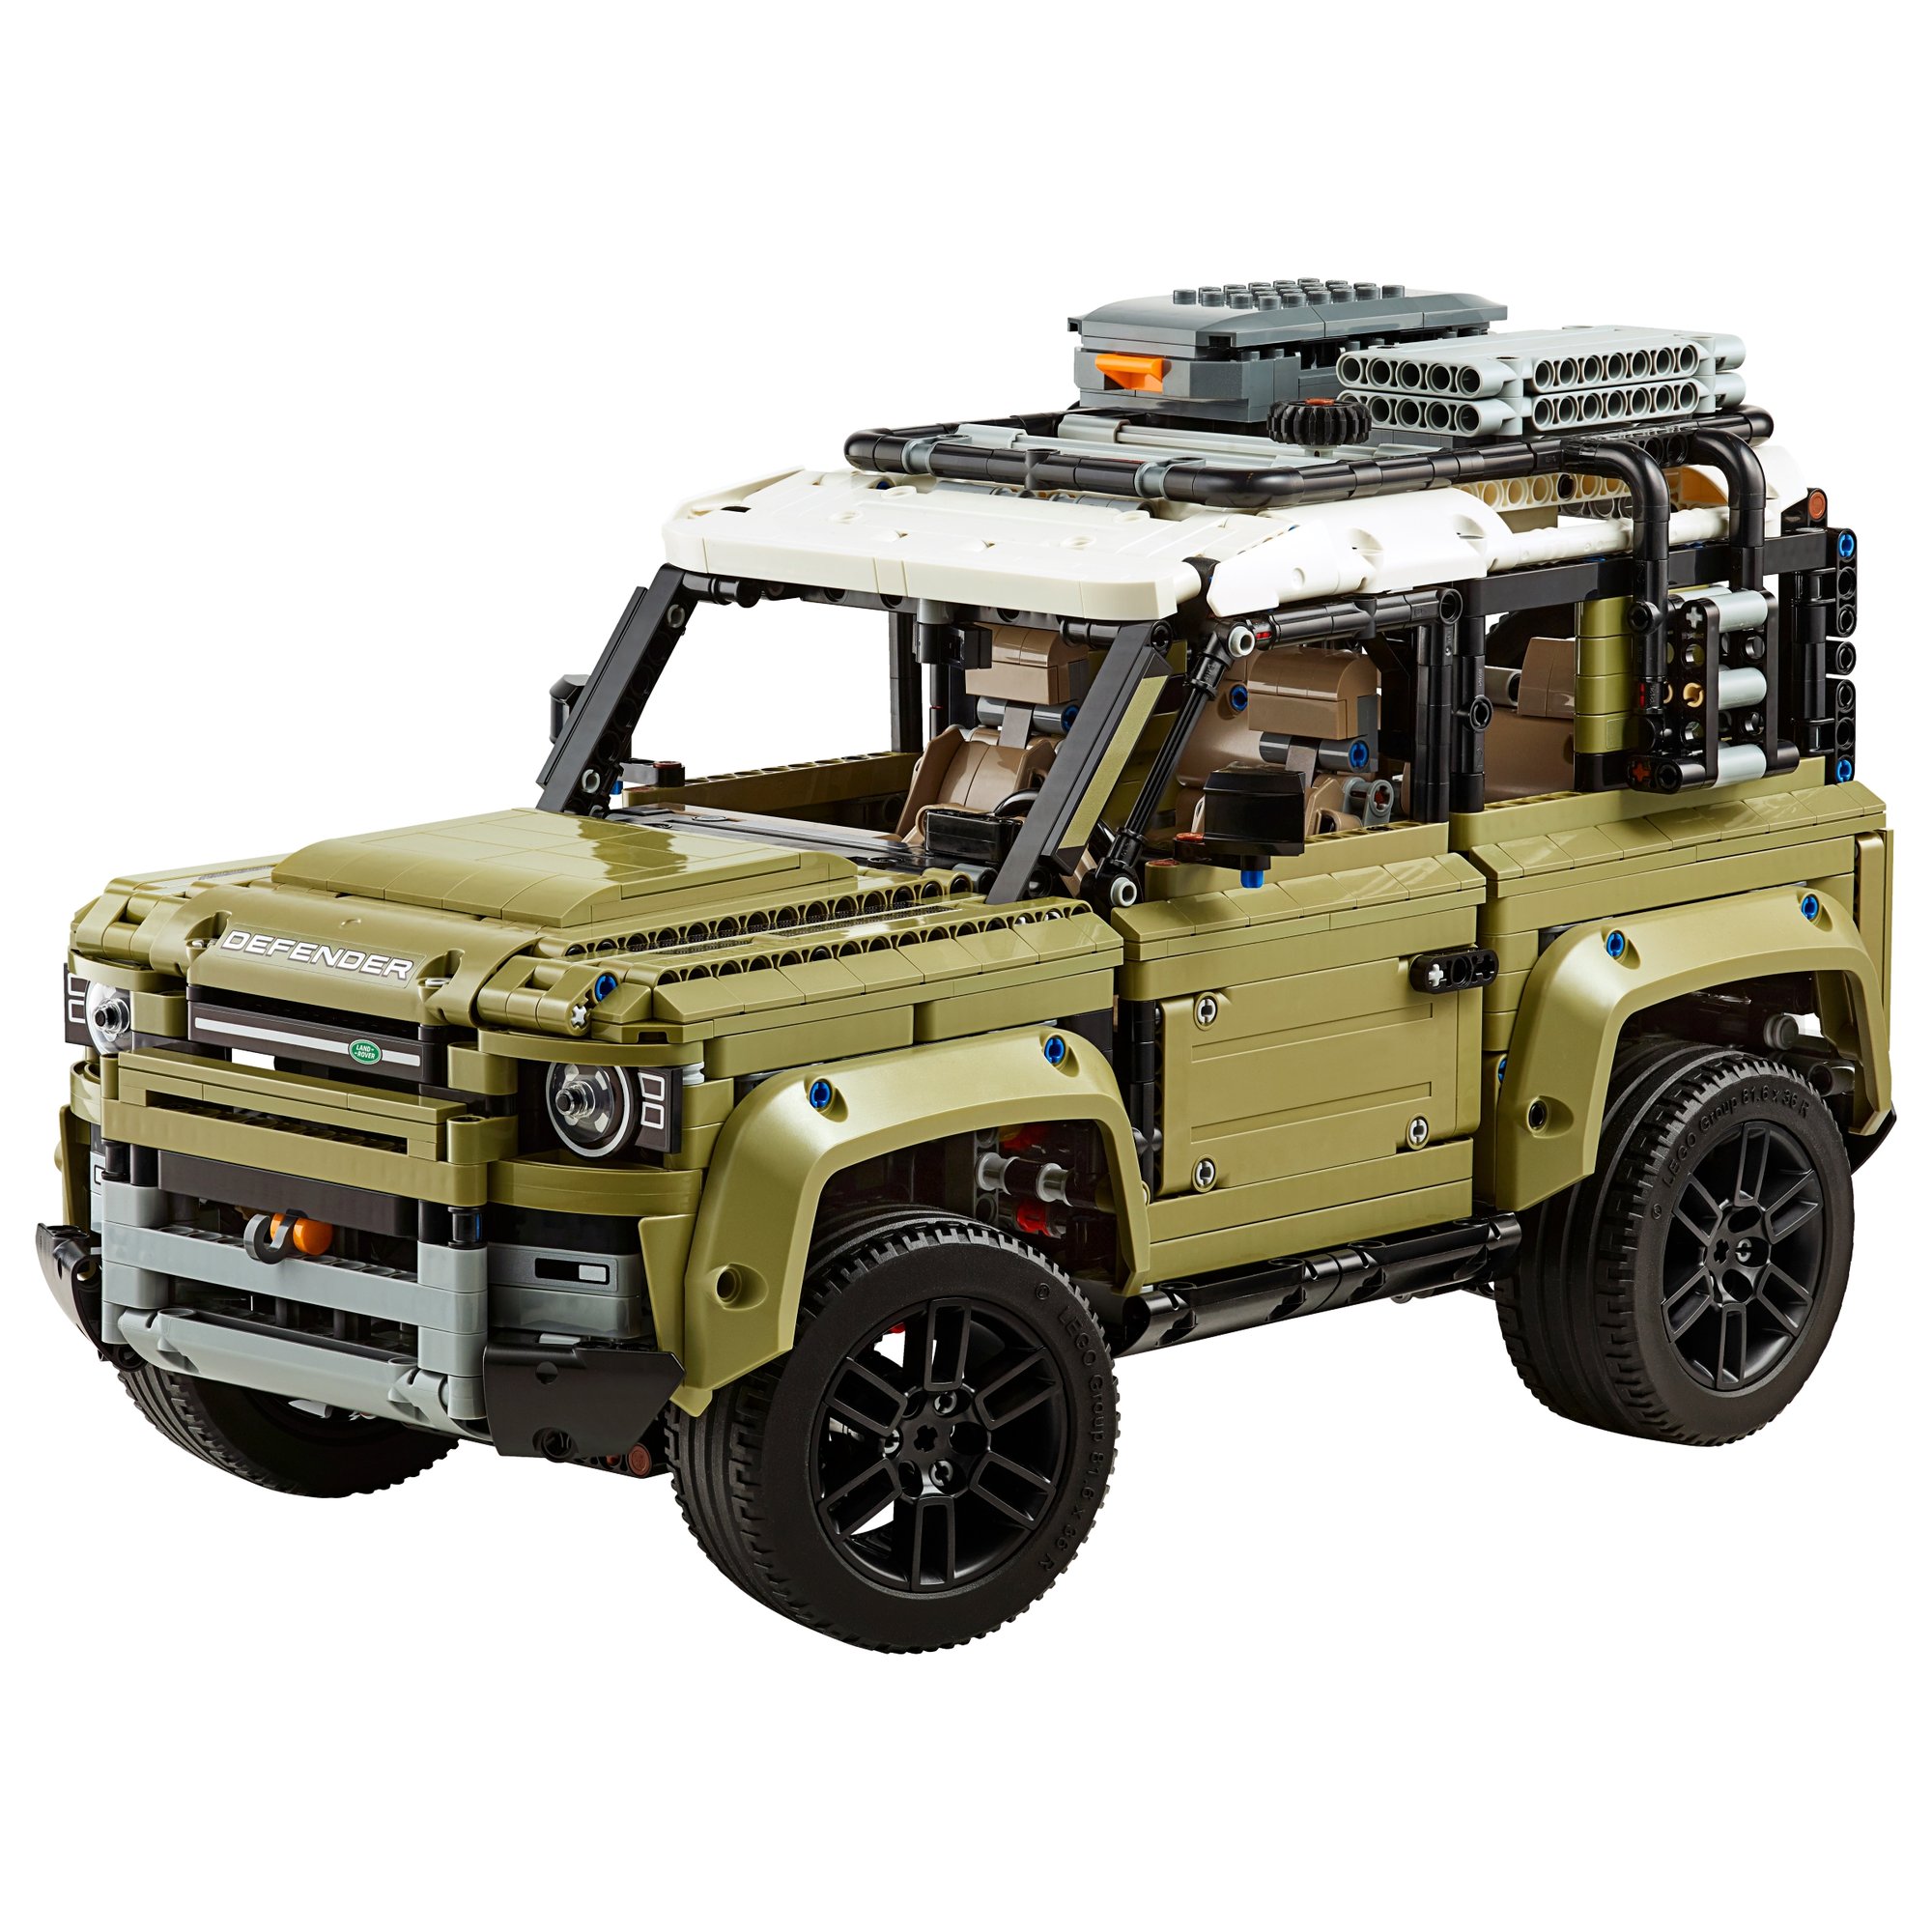
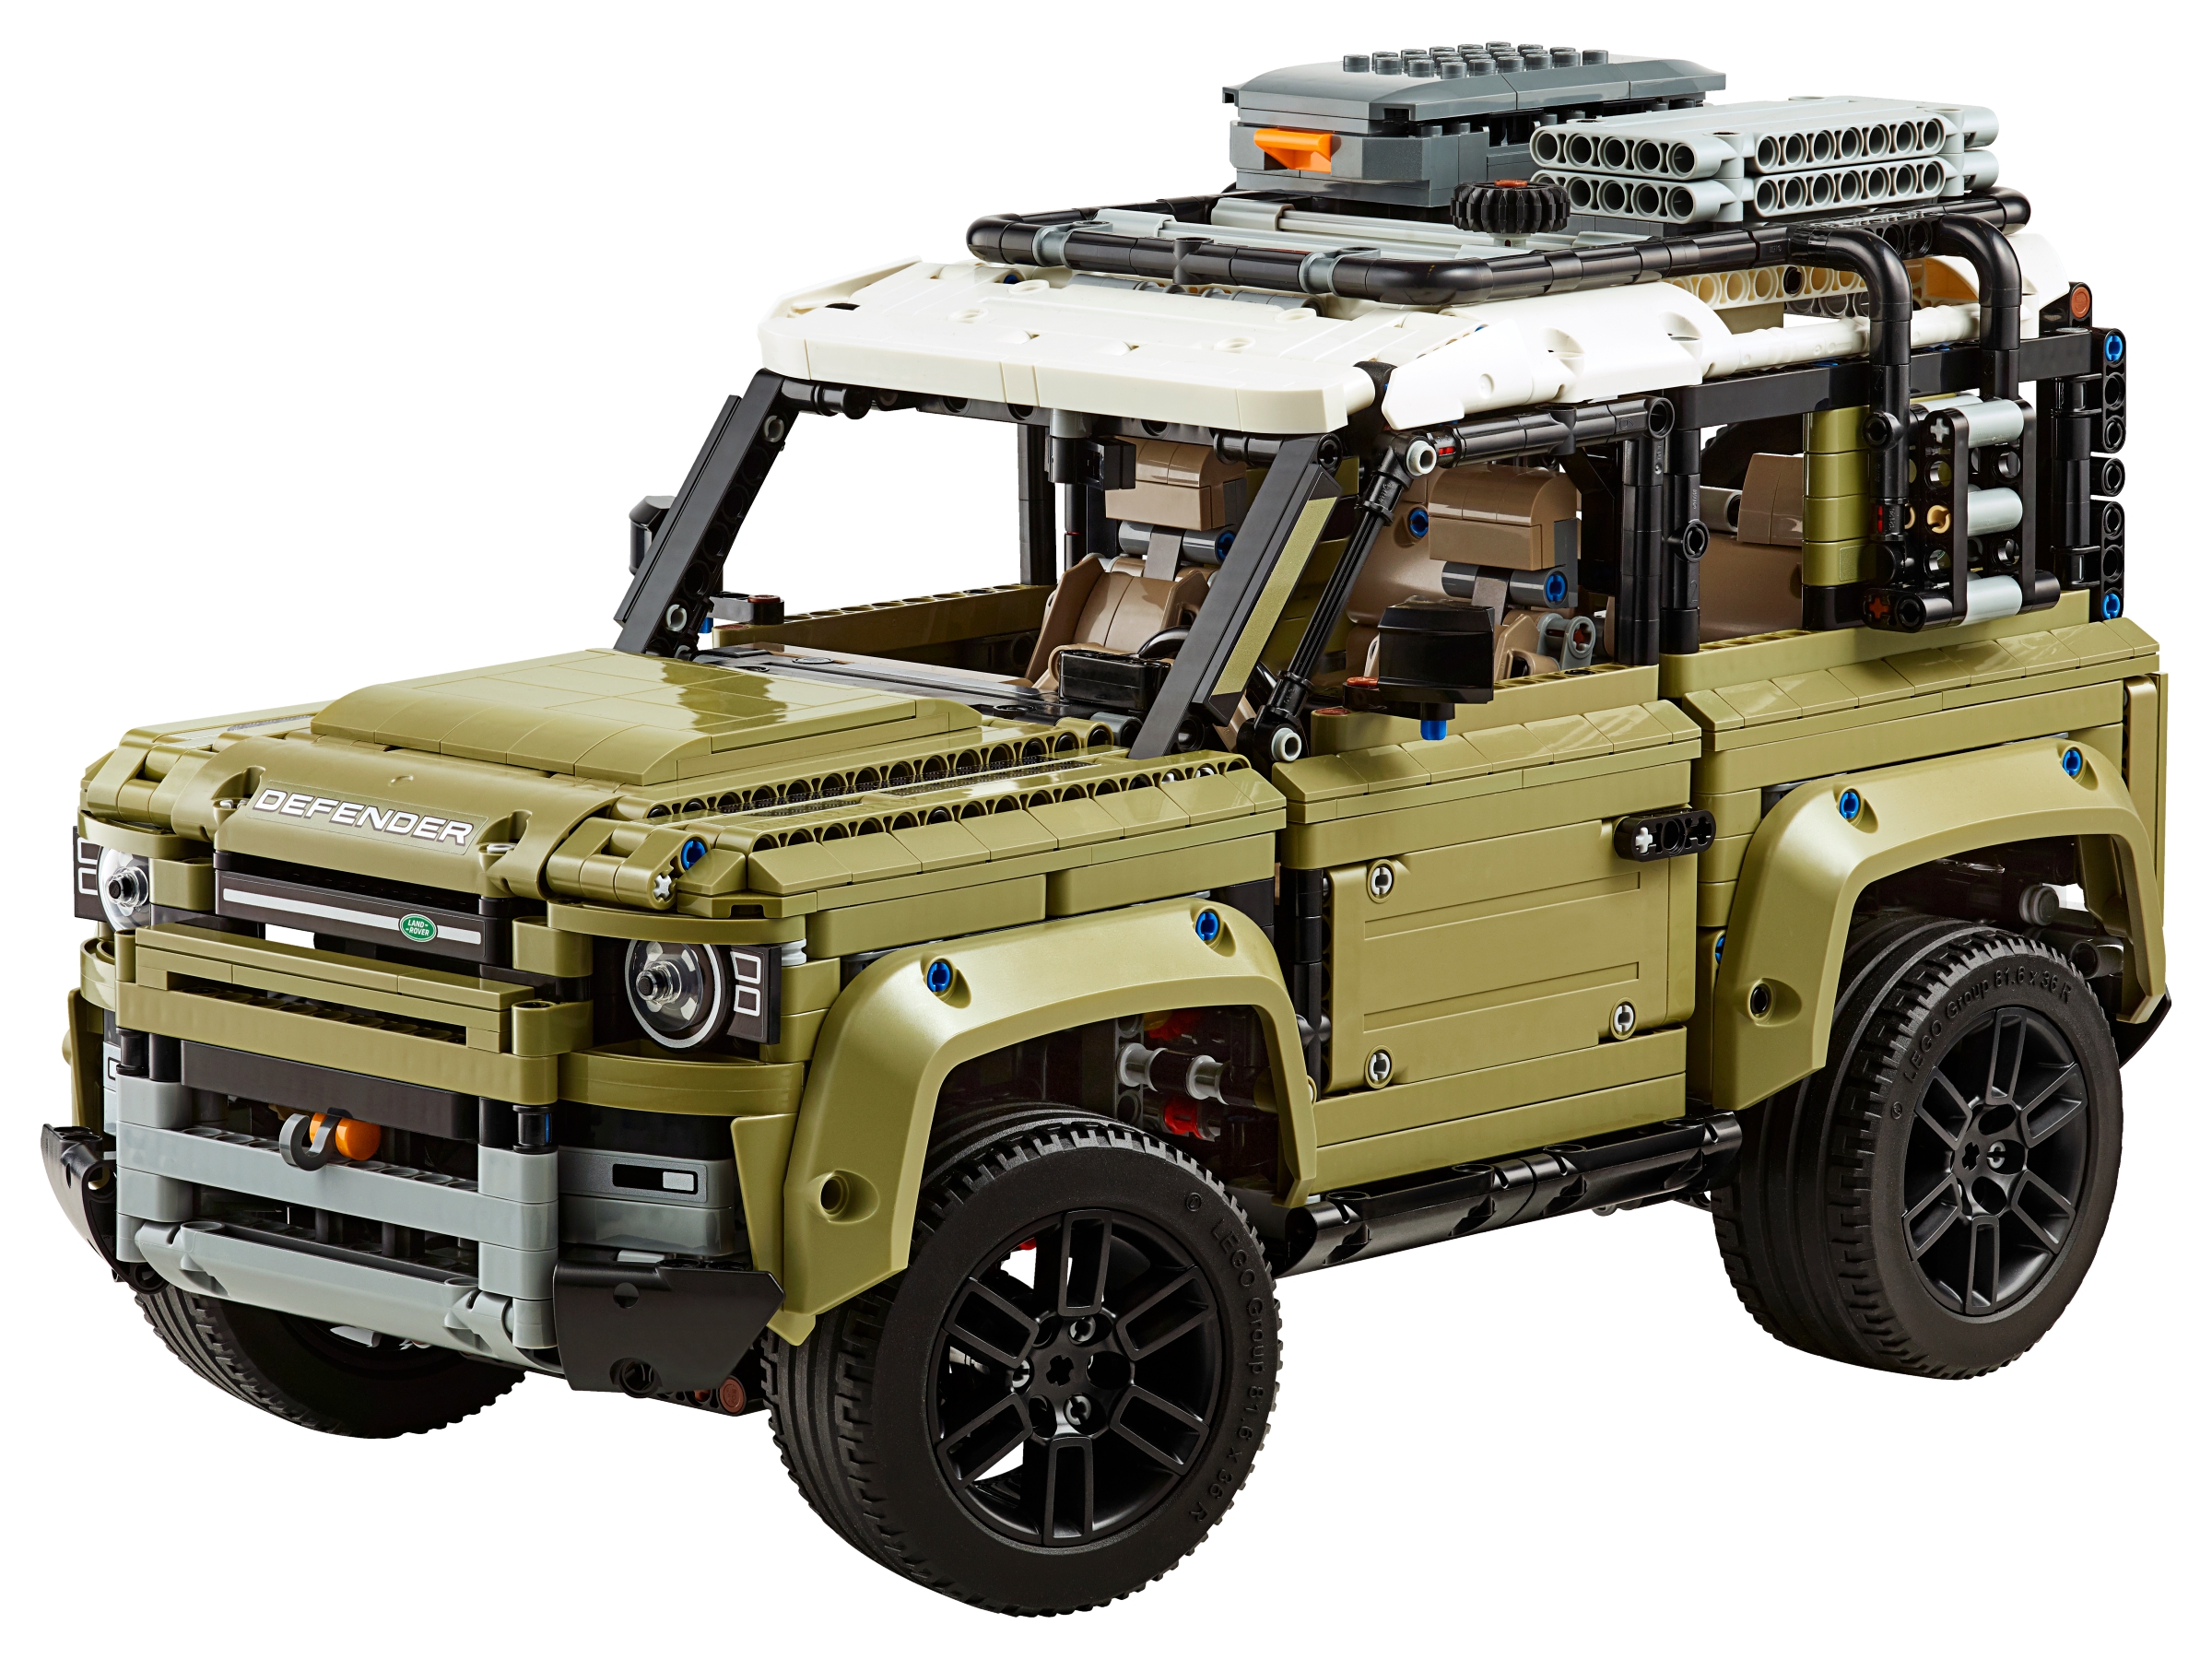
Most Technic cars with a serious gearbox are supercars. This one is a Defender 90 in olive green with a white roof, and it carries more gearbox than any of them did at the time. A four-speed sequential box sits on the rear axle, then a second unit at the front adds reverse, neutral and drive plus high and low range. Count them the way New Elementary did and that is nine different gears, worked from three controls between the front seats and turning a six-cylinder engine under the bonnet. LEGO called it the most advanced gearbox they had put in a set. None of the reviewers who built it disagreed, and several of them wished it were simpler.
It is in the Brick Club library. Below is what it does, how the four numbered bag groups split the build, and the places where reviewers went back and rebuilt.

Why this one is different
The designer is Milan Reindl, who later did the Mercedes-Benz G 500 (42177) that sits next to this one on our off-road shelf. The two make a pair. The Mercedes is about differentials and their locks; the Defender is about the gearbox. Milan told The Brothers Brick the gearbox was the most challenging part of the model to create, and the reviewer could see why: it is the most complex gearbox in an official set to date and still had to fit under the truck without getting in the way of the suspension. He also told them it cannot easily be motorised, which the reviewer suspected fans would take as a challenge.
It was the first Technic model built mostly in olive green. The colour had existed since 2012, but a good selection of the Technic beams, L-beams and panels here appeared in it for the first time, and the only brand-new moulds are the squared-off mudguards and the six-spoke wheels. The wheels matter more than they sound: the pin holes sit closer to the outside of the rim, which gives better steering geometry, and Victor at New Elementary expected them to change how fans build cars at a smaller scale. The model is the two-door 90, whatever the set number suggests, and LEGO wavered between olive and sand green before settling on this.
Instructions are a single book, 494 pages and 860 steps by Huw’s count (others made it 495 and 496; either way it is a doorstop). There is no B-model, which is normal for a licensed set, though Milan published an unofficial stadium truck of his own. The box weighs about three and a half kilograms.
What it actually does
Everything is manual and everything below is driven from the wheels or from a control you can reach. Five reviewers in our file built the set, so where they disagree I have said so rather than pick one.
The four-speed unit is built around the rear axle and uses the same rotary shifting mechanism the Bugatti Chiron (42083) introduced the year before. You work it from a round knob at the back of the centre console: twist one way for plus, the other for minus. Inside, a 7L liftarm with an elastic band pulls the lever mechanism back after each shift, which is how it steps one gear at a time. Jim at Eurobricks thought that arrangement too complicated for the job and found the band loose enough to slip off. Once the car is finished, lift the rear seats and open the back door and you can watch the gears and the selector move as you turn the knob.
The second gearbox lives at the front alongside the steering and the engine. Two levers by the driver’s seat: the left one picks reverse, neutral or drive, the right one high or low range. With the four speeds behind them that makes nine ratios, and it is a single reverse, which Jim counted as a plus. Because the truck is four-wheel drive, the gearbox spans both axles. The catch is the labelling. The engine turns faster in fourth than in first, and faster in high than in low, the opposite of a real car, and Eurobricks members argued the HI/LO and plus/minus stickers ought to be swapped. Victor hoped it was deliberate, so a child sees the engine speed up as the car goes through the gears.
Under the bonnet, on top of the front suspension, sits an inline six with a crankshaft that pushes the pistons up and down as the wheels turn. It is not built from the usual cylinder and piston parts. It is built instead from 1x3x3 liftarms (the biscuits), bushes and axles, a technique first seen in Milan’s Mack Anthem (42078). How fast it turns depends on the gear you are in, and how far you push before it turns depends on the slack: Jim found some gears need a metre of pushing before the pistons visibly move.
The steering wheel works, and a small gear on the roof does the same job from outside, which is the one thing The Brothers Brick wished the Porsche 911 GT3 RS (42056) and the Chiron had. The roof gear pulls off if you want a cleaner car for display. Steering is crisp on the move and stiff with the model standing still, which Jim says is usual at this size. A small detail worth noticing: the steering wheel gets its angle by being trapped between a 1×1 round tile and a pin with a stud.
Two red springs at the rear, one red and one grey at the front, so the front end is slightly softer. Every reviewer liked it. It is soft and bouncy, it does not sag, it rides up and over large obstacles, and Jim rated it better than the Bugatti’s. There is no ride height adjustment, which he listed as the one extra function he missed.
Lift the bonnet and there is a winch worked by a gear on the left, with a red lever at bottom right that sets a ratchet so it cannot pay out under load. Round the back, twisting the spare wheel releases a spring-loaded catch on the rear door: Victor liked the parts trick behind it, Jim found it bulky for what it does. The folding ladder on the side gives access to the roof rack, which carries two storage boxes that open (one on top, one on the passenger side) and two plates you can pull down and lay across a gap to get out of the mud. The whole rack lifts off for what Huw calls the Chelsea Tractor version, and the black frame under the white roof is strong enough to lift the model by.
How the build goes
Twenty-one bags in four numbered groups (one review says six groups; the other four agree on four), eight of them in an inner box holding groups 1 and 4. The four groups are the rear of the chassis, the front of the chassis, the rear of the bodywork and the front of the bodywork. The Brothers Brick puts the whole thing at the better part of a day.
Rear axle and the four-speed box
The rear suspension first, on two red springs, and it looks like a front axle until the four-speed gearbox goes on top of it. Kim at Live Science calls these the least enjoyable couple of hours because nothing yet looks like anything. Seat the ratchet lever and its elastic band properly, then turn the input by hand through all four gears before you move on.
Front chassis, and the join
The front half carries the reverse, neutral and drive selector, the high and low selector, the steering and the six-cylinder engine on top of the front suspension. Huw’s advice is blunt: take your time, because a mistake here usually means dismantling the lot. Then the two halves are mated. The Brothers Brick calls it tricky and precise; Live Science calls it the most awkward step in the whole build because so many parts have to line up at once. When it clicks, fit the wheels and test every gear, because the dashboard and seats go on next and half the gearbox disappears under them. By the end of bags 2 the chassis and interior are finished.
Rear bodywork
Doors, side panels, the rear door with its spare-wheel catch, and the interior door stickers. This is where the olive green goes on, the build gets quicker and it starts to look like a Defender. After bags 3 there is only the front, the bonnet and the roof rack left.
Front end, bonnet and roof rack
The grille and headlights, mostly stickers, then the bonnet over the winch, then the roof rack built as a separate unit with the storage box, the ladder and the two plates for getting out of the mud. Jim’s view is that the front end is what turns the model into a Land Rover, and looking at it finished it is hard to argue.
No member diary for this one yet, so these come from the five reviewers who built it.
- Front seats sit too high if the pin is in the wrong hole. Jim mounted his wrong first time and only noticed when the roof would not go on. The black pin under each seat goes in the bottom hole of the bent liftarm.
- Cracking in the gearbox. Huw, with twenty years of Technic behind him, heard gear cracking in the higher gears and was not sure he had built it right. Victor found first and second barely worked while third, fourth and reverse were fine. A reader in his comments suggested cracking can come from the two universal joints being out of line (Victor had already aligned his), so check they are aligned before the body goes on.
- Slack in the drivetrain. With this many gears, some ratios need a push of a metre or so before the pistons visibly move. That is the design, not a fault, and it is a poor reason to take the chassis apart.
- Door stickers. Four per door, on the inside, hard to align, and they look odd from an angle. There are over 30 stickers in the set and the model looks fine without the interior ones.
- The elastic band on the shift lever. Jim found it loose enough to slip off. Check it is seated before the rear seats go over the gearbox, because after that it is out of reach.
On the shelf
Finished, it is 42 cm long, 20 cm wide and 22 cm tall with the rack on, so it needs less shelf length than the 1:8 supercars but stands taller. The olive green is not quite the shade Land Rover paints them but it suits the shape, and the white roof wants a darker background if you photograph it, as Huw found. The rack, boxes, ladder and steering gear all come off if you would rather display the bare car.
Leave a door open. The dark tan interior, the sculpted front seats with their headrests and the three gear controls are what people lean in to look at. If you want to show the gearbox working, lift the rear seat pads and open the back door.
This is the one for you if you want the hardest gearbox build in the library inside a car you can then actually play with. The first two bag groups are the test, and the join between the halves is the moment to be patient. Allow a full day or three evenings, test every gear before the seats go on, and do not be discouraged if some gears grumble: Huw’s and Victor’s did too. If you would rather the drivetrain were about differentials than gears, the G 500 (42177), from the same designer, is the next one to try.
If you like this one, try
The other off-road and 4×4 kits in the library. The G 500 is the Defender’s sibling from the same designer; the Extreme Adventure is the set Jim said this one reminded him of; the Zetros and the X-treme Off-Roader are app-controlled if you want the drivetrain to move under its own power.


The Land Rover Defender is in the library
Technic Fan gets up to 6 kits a year, Master Builder up to 12. Delivery both ways is included and the prepaid return label is in the box.