

Chris’s build, box by box, before the green went on
Most photos of the Sián show the finished car, doors up, plate at the front. Chris, a Brick Club member, sent photos from the middle of his build instead, when the V12 and the gearbox were still sitting in the open on his dining table. That is the version of this set worth looking at before you want it, because the part you spend the most hours on is the part that disappears.
The full Sián spotlight covers the whole set: the printed elements, the six inner boxes, every function with its drive path, and where people slip up. This post follows Chris’s build instead, stage by stage, using his photos and The Brothers Brick’s box-by-box review to say what is happening at each one. The diary puts the build at seven to eight hours, and the reviewer called it one of the longest construction times you will meet in a set.
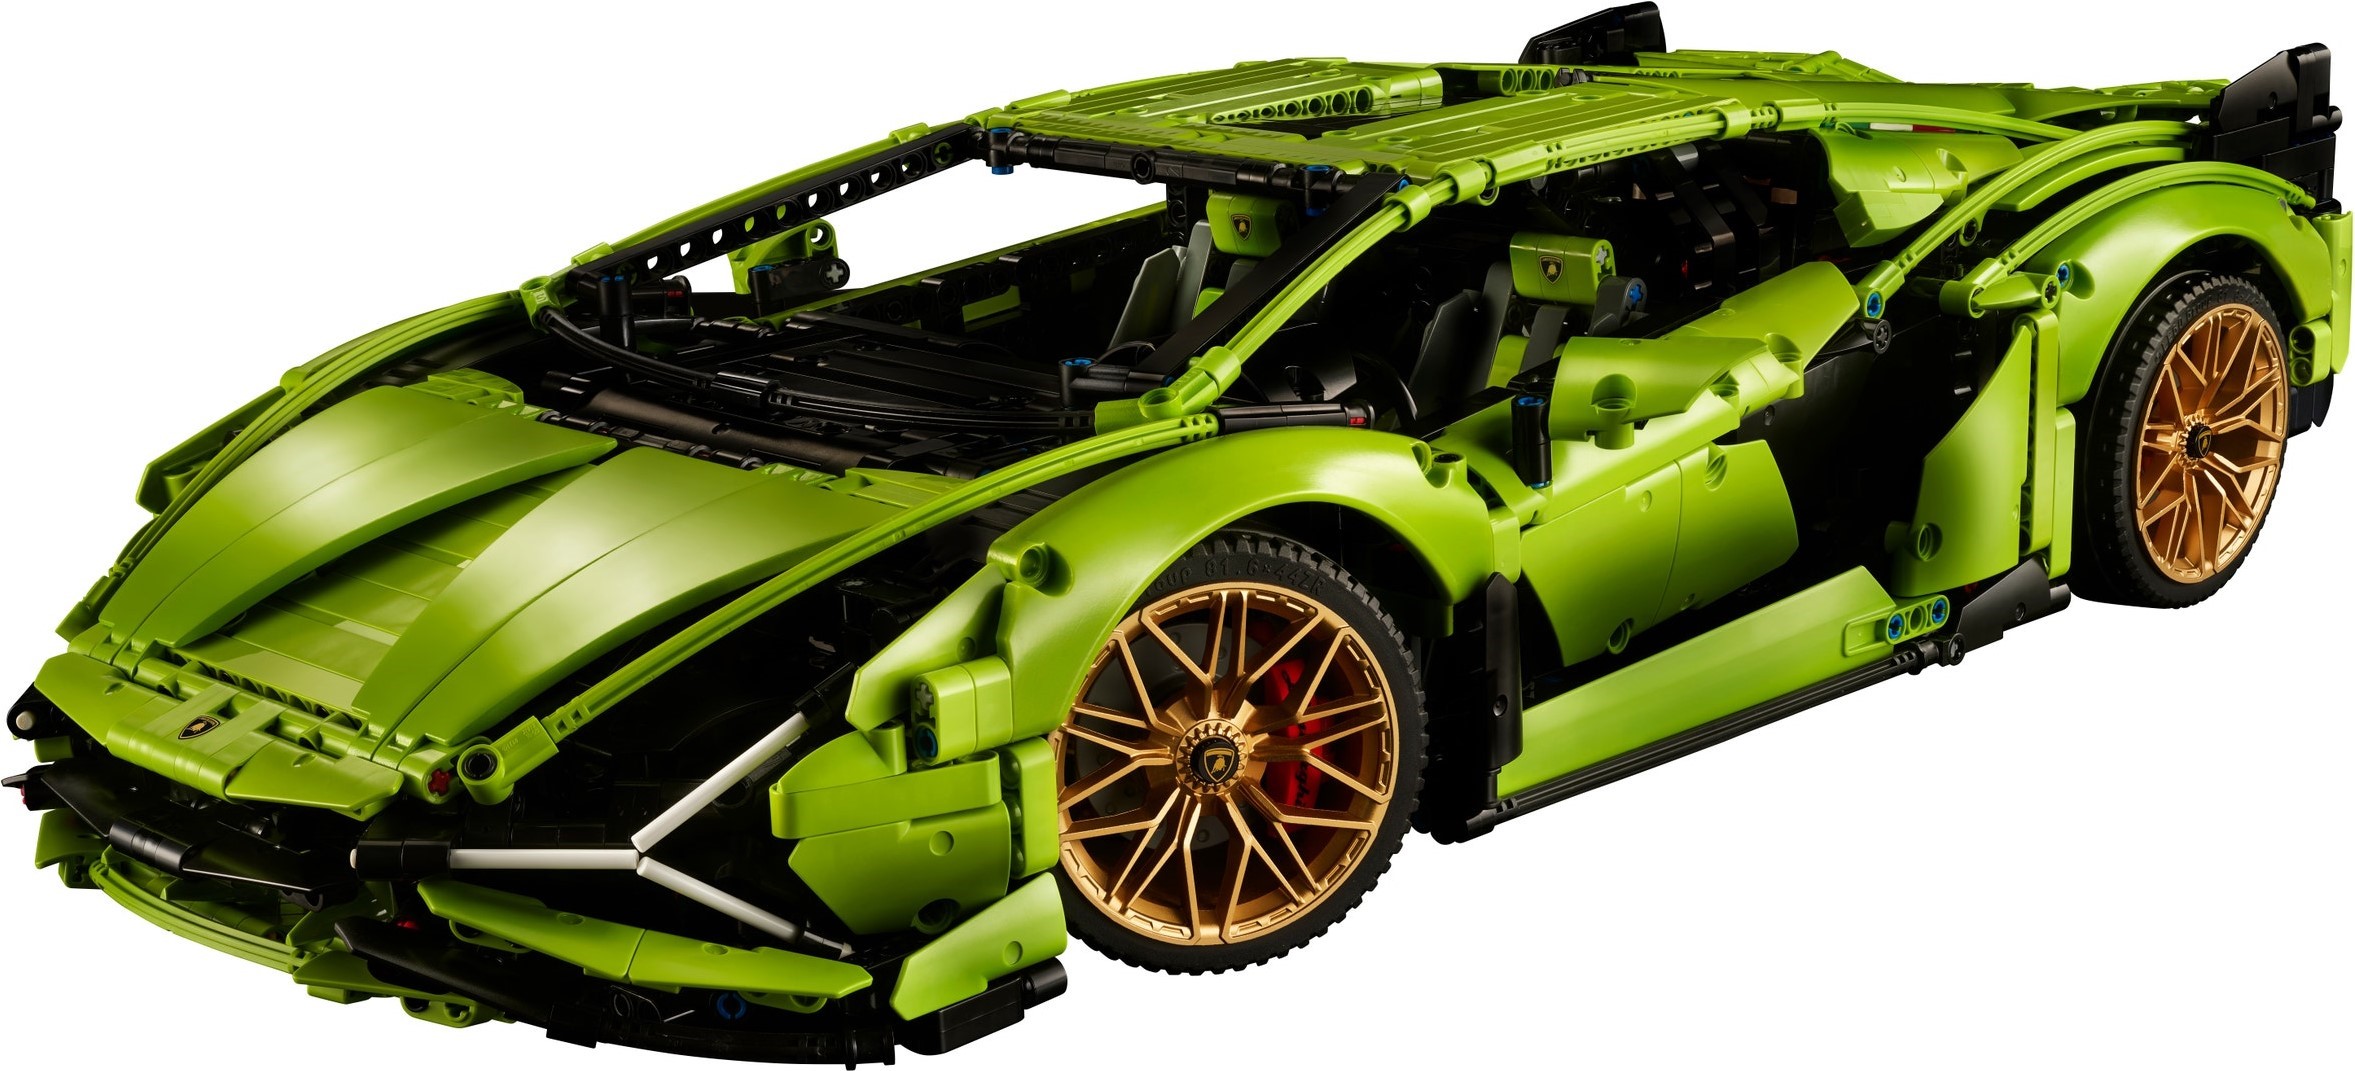
What Chris’s photos show that the box art does not
A photo of the bare chassis explains the set’s oddest number. All 3,696 pieces come in just five parts groups, because box six holds only the tyres and rims, so each new box means digging through more than 700 pieces. Chris’s early photos show where most of them went: the black gearbox that takes up a good deal of the car’s bulk, four stiff springs on the rear suspension, the differential, and the V12 with its printed carbon-fibre cover.
Two notes from the build diary matter more than anything in the reviews. The V12 sub-assembly is where most of the time goes, and once the rear panels are on, access gets tight. Both line up with the review: the engine goes in during box two, the rear bodywork arrives in box four, and the engine lid does not hinge, so seeing the engine afterwards means lifting the cover off entirely.
What it does, briefly
Four functions, in the order Chris met them. Each has its full write-up, with the drive path and the reviewer’s notes, in the main Sián spotlight. This is the short version.
Twelve of the piston and cylinder pairs LEGO introduced in 1990, so it is the same engine as every other Technic set, a dozen times over. It goes in during box two, after the gearbox, with round and macaroni bricks for the exhaust and printed carbon-fibre tiles on top. On the finished car the lid slots on with a pair of long axle pins and comes off completely or not at all, so Chris’s photo of this stage is the clearest look at it you will get.
Press down on a panel just behind and above each seat and the door swings up with a surprisingly swift motion. You close it by hand. The mechanism is a pair of long beams in channels along the cockpit sides, built in box three, long before the doors arrive at the end of box five. The diary’s verdict was that they open at the correct angle; Chris’s doors-up photo is below.
Paddles either side of the steering wheel, a small forward, neutral and reverse shifter in the centre console, and a ka-chunk each time a paddle sends the motion down. The reviewer’s view was that it brings little new over the previous two cars. The best part is underneath: several intentional windows in the floor, so turn the car over and shift to watch the clutches engage and disengage.
A lever in the passenger footwell works a linkage that runs just inside the passenger door, and a centre pylon lifts the wing, itself a weave of connectors and small panels. It is raised in Chris’s rear photo.
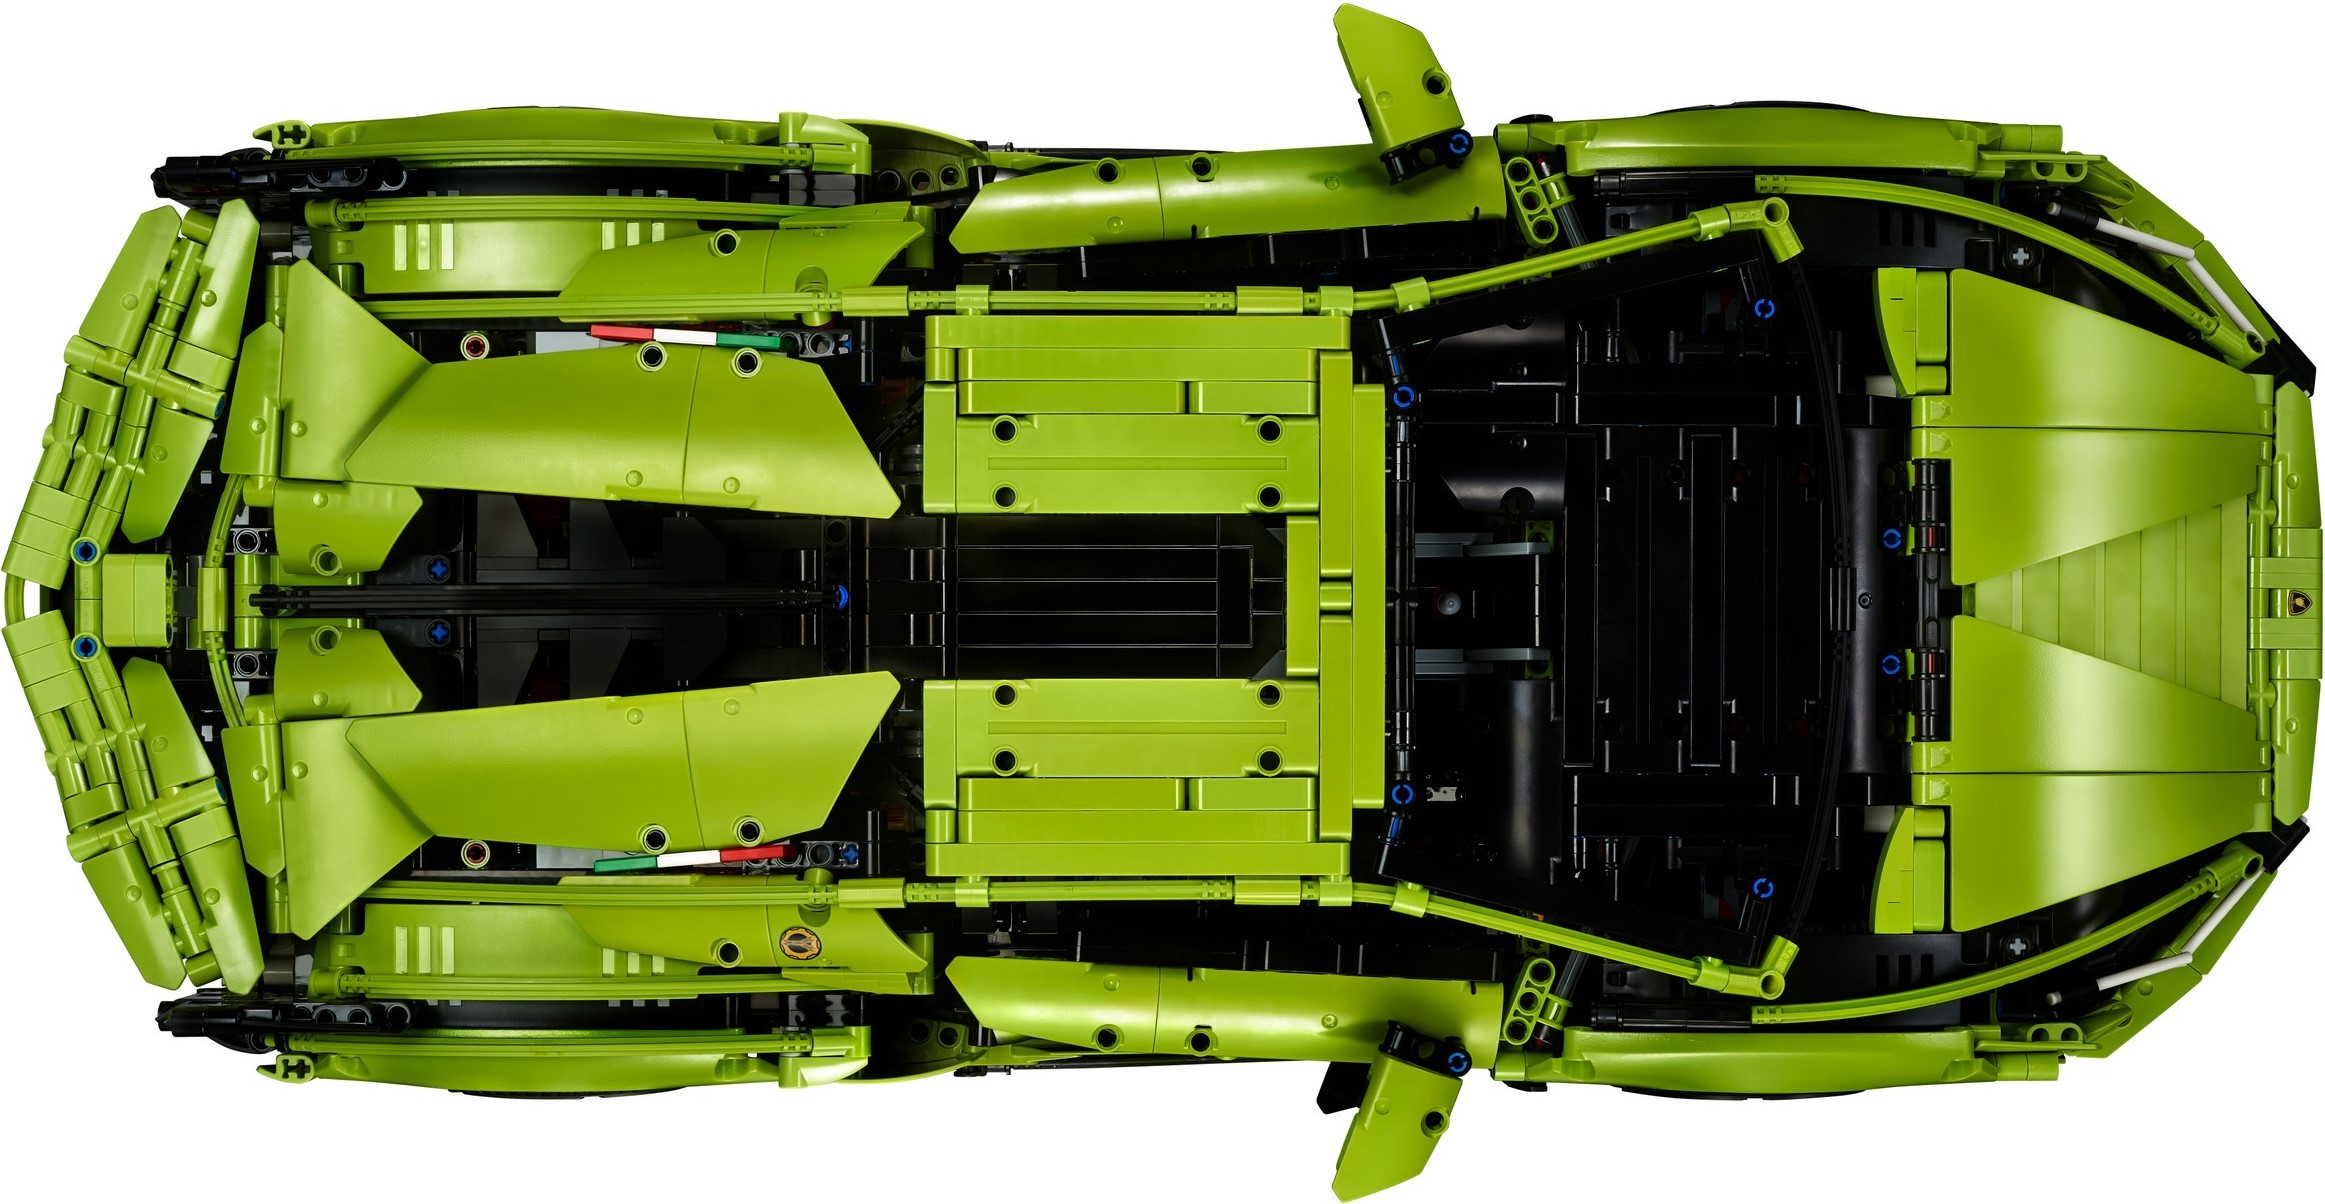
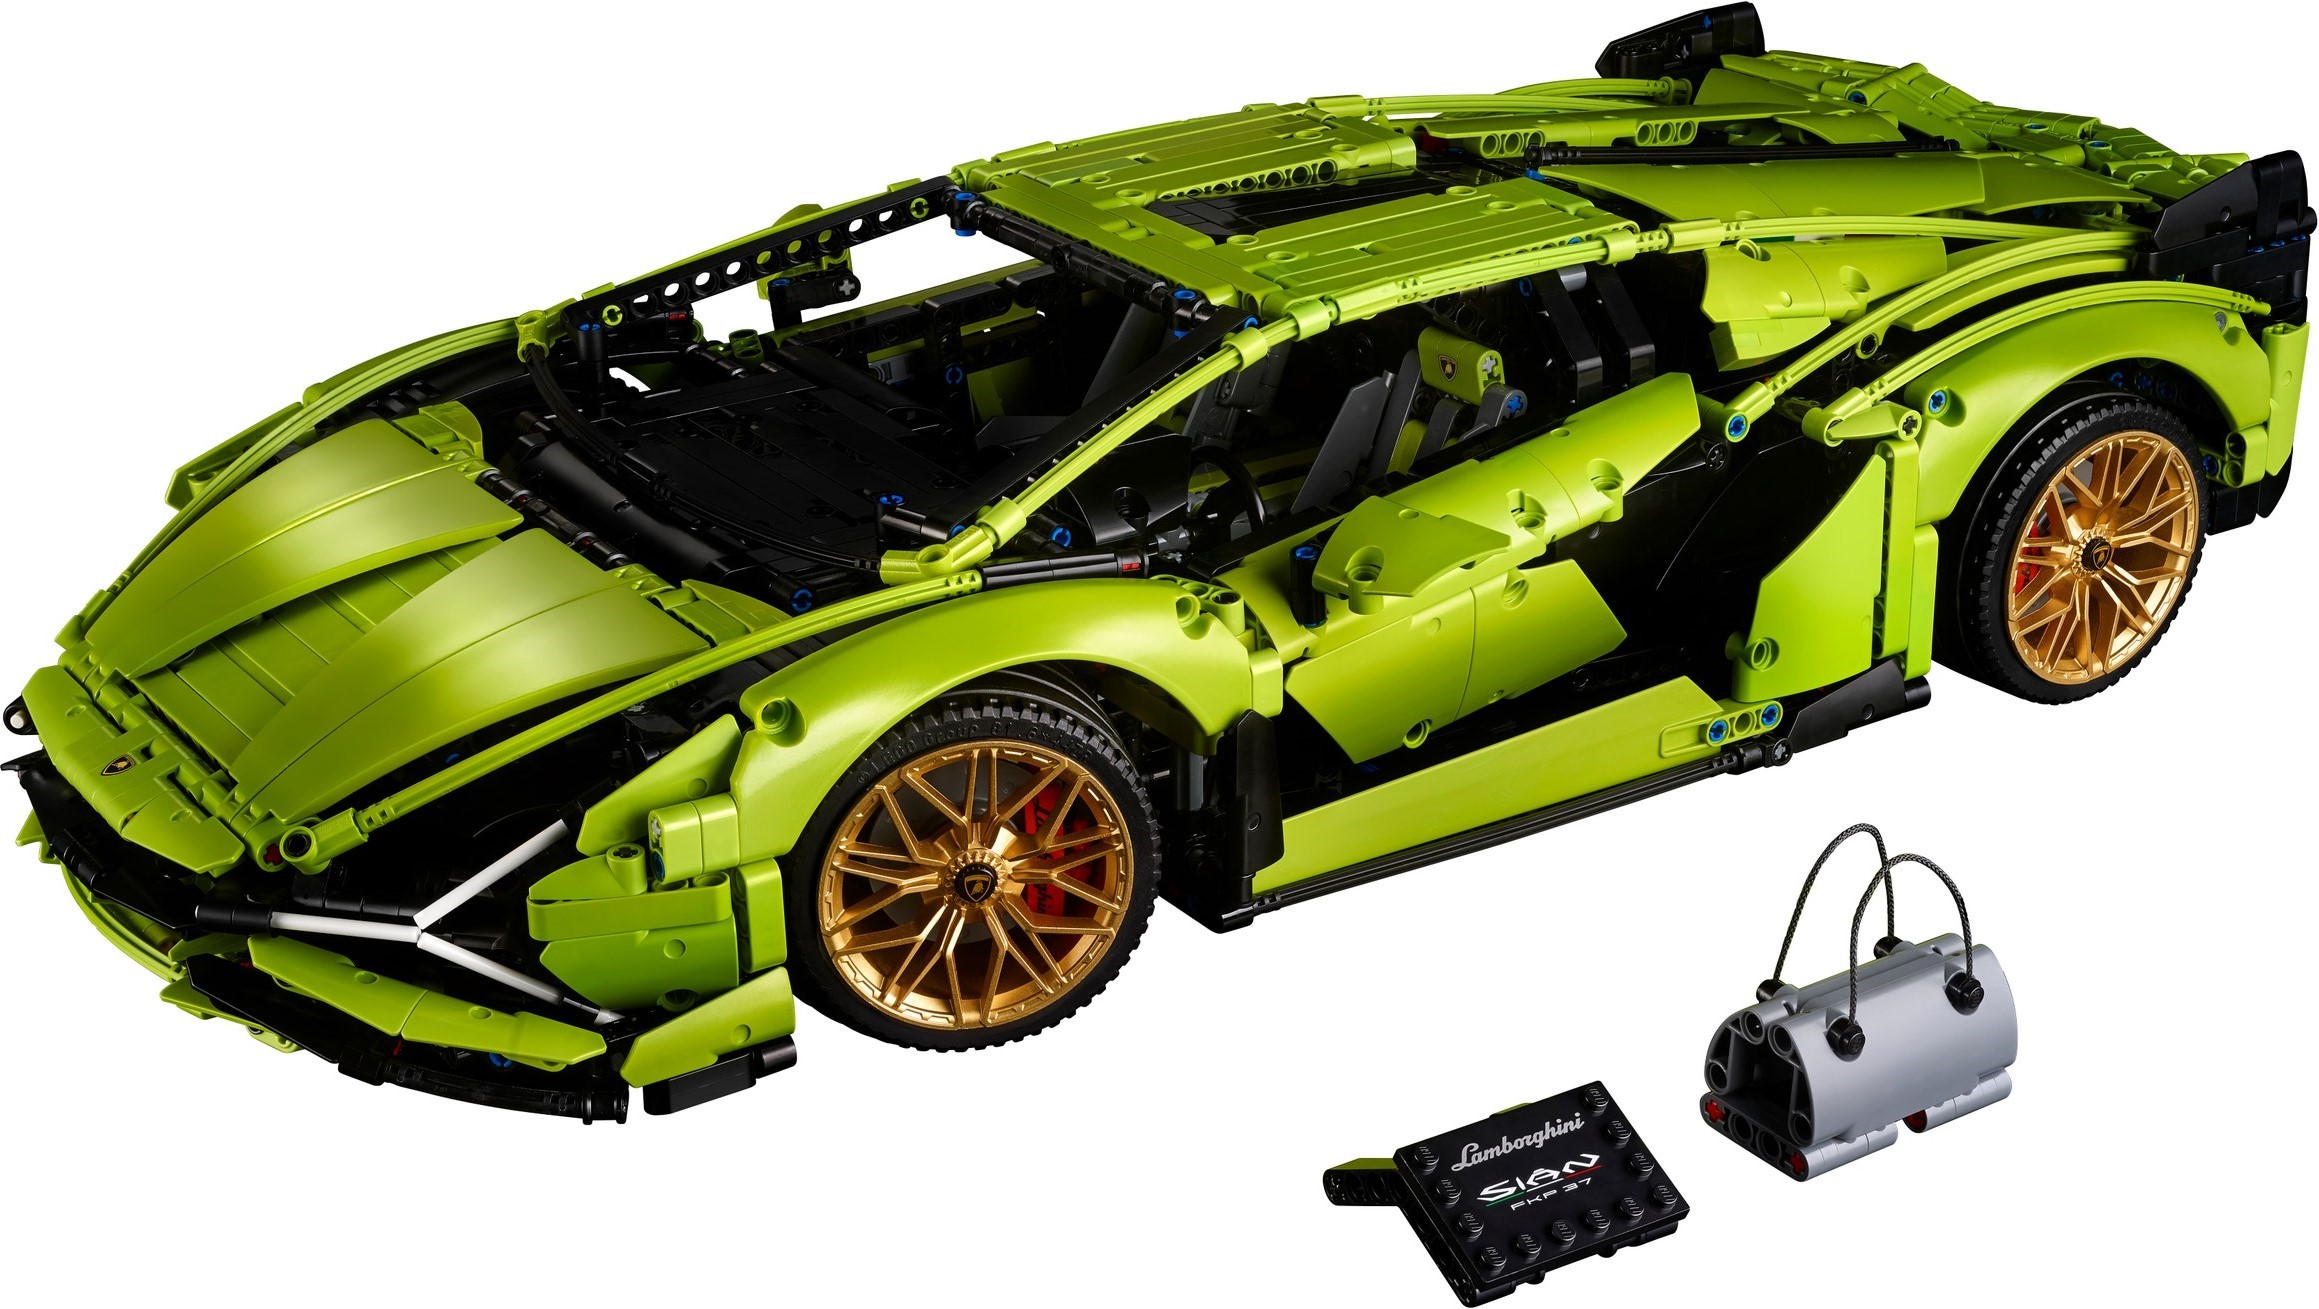
Chris’s build in three sittings
The six inner boxes match the numbered parts groups. Grouped here into three sittings, which is roughly how seven to eight hours divides.
Gearbox, rear suspension, V12 and the front end
Rear suspension first, then the gearbox, and at the end of box one the two are mated to the beginnings of the frame with the paddle shifters already visible. Box two is the engine, then the front suspension and differential, largely the rear unit again; mating it to the chassis means lining up a handful of pins and axles at once. Chris’s two chassis photos were taken at the end of this sitting, 75 percent of the way through the first manual.
Seats, the door and spoiler mechanisms, rear bodywork
Box three is the interior: racing bucket seats with a printed crest on the headrest, the long beams for the doors, the spoiler linkage, and the reinforced roof section you will later lift the car by. Box four is labelled Rear Spoiler but carries most of the rear bodywork, the hexagonal tail lights in new red tent slopes and the engine lid. Chris’s side-on photo, rear panelled and nose bare, is this exact point.
Nose, doors, wheels and the plate
The splitter, then the headlight assemblies, which the reviewer called one of the oddest constructions he had met for a part that does not move, all to hold three white blades at the right angles. Then the doors. Box six is the gold hubs and tyres. A few pieces from box five remain for the grey bag in the front boot and the display plate on Chris’s table.
Three things, and the first is the one the build diary flags.
- The rear closes up on you. The build diary’s note is that access gets tight once the rear panels are on, and the review explains why: the engine lid slots in with two long axle pins rather than hinging, so afterwards the only way to see the V12 is to take the lid off. Photograph the engine bay in box two, as Chris did.
- Mating the front end. A handful of pins and axles have to align at the same time when the front suspension unit meets the chassis. It takes a minute and then goes together smoothly. Do not force it.
- Lifting it, and the wheel crests. The handle is the reinforced roof section at the windscreen, and the roof panels are a bit larger than it, so check what you are holding. Then press each printed crest tile into its gold hub straight the first time; the rim shape means you will be hard pressed to remove it.
On the table
It is 60 cm long, 25 cm wide and 13 cm high, and as Chris’s photos show it wants a dining table. Not every element is quite the same lime: the small connectors run several shades darker, and the two large panels either side of the engine cover can differ. LEGO replaced some for buyers at the time. If our copy shows it, that is the set, not your build.
Display it doors up with the plate beside it, as Chris did, and decide whether the engine lid is on or off; it does not sit half open.
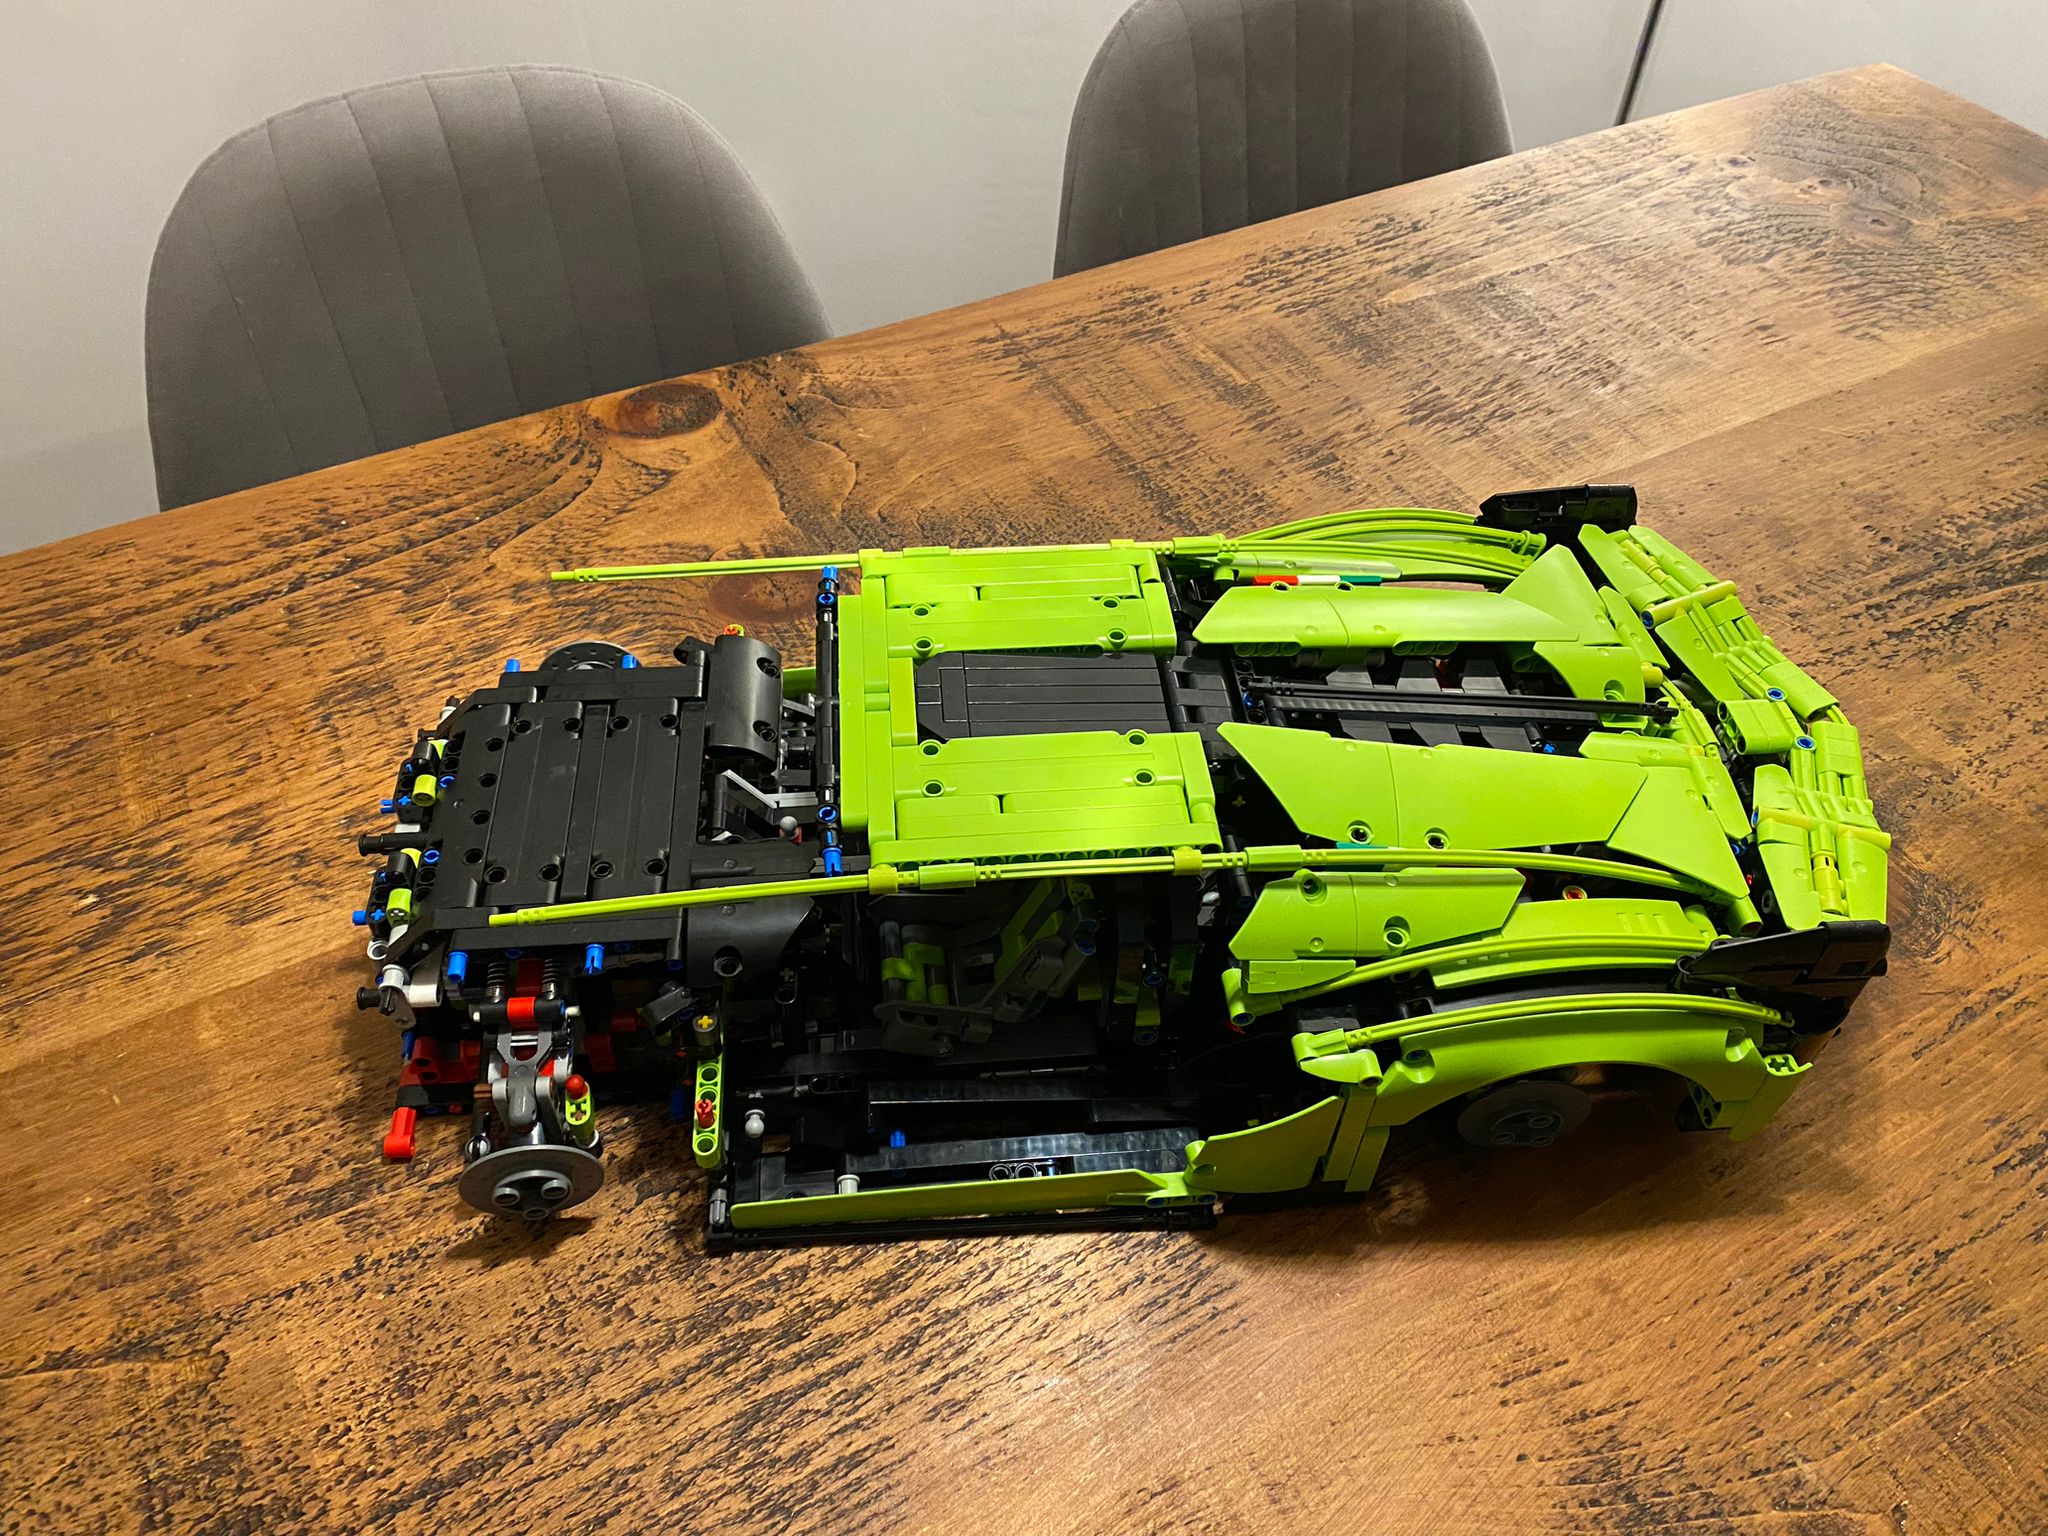
Chris’s build, in order
Chris built the Sián mid-subscription and photographed it as it went together. The pictures are in build order and each links to his diary.


It is the one for you if you want the build more than the shelf model. The reviewer’s view was that anyone new to the 1:8 cars will find it one of the most engaging builds going, while anyone who has done the Porsche 911 GT3 RS (42056) or the Bugatti Chiron (42083) will meet few surprises. Allow three sittings and a full table. Photograph the engine bay before box four, find the handle before you lift it, and read the full spotlight for the rest.
If you like this one, try
The other 1:8 cars in the library, plus the Lamborghini that came after this one at a smaller scale.



The Lamborghini Sián FKP 37 is in the library
Technic Fan gets up to 6 kits a year, Master Builder up to 12. Delivery both ways is included and the prepaid return label is in the box.